September 20, 2014

Tweety Twick or Tweat

A favorite teacher and friend here in Florida is Jill Haglund - "Tweety Jill", TJ Designs - yes you might know the name, she has been involved in the art/crafts industry for many years, authored and published numerous books with fellow designers and has the most AMAZING STAMP SETS in many categories as well as beautiful full color PACKS of collage sheets to use in your creations.  I have had the pleasure of attending her classes, drawing from her bubbly personality & energy while making beautiful home decor.  Here are two projects featuring her Halloween stamps and collage paper packs.  I hope you will contact her on Facebook at facebook.com/jill.haglund.3 or jill@tweetyjill.com to order your sets today and prepare for the holidays.

Stamp TJ Vintage Halloween and Trick or Treat stamps onto orange tissue paper with Archival black ink - when dry, tear around the edges or cut out.

Trim Halloween cards prints and memorabilia from TJ Vintage Halloween PAPER Pack and the Vintage Halloween COLLAGE pack - I sometimes use deckle edge decorative scissors (they are still out there) to add interest to the overall design.  I also try to find Halloween napkins that can be separated into thinner layers, torn and collaged - it fills in spaces between stamps and prints - the napkin I used here was cobwebs. Using a heavy bodied paper glue, adhere the larger prints around the pumpkins working paper into the crevices - dry.  You might have to come back and make sure the edges of the larger prints are glued into place (have not popped up) and re-glue if needed - dry. Using Ranger Matte Medium and a 1/2" to 1" synthetic paint brush, begin add the layers together of stamped tissue and napkin images - dry overnight.
Add a second coat of the Matte Medium to be sure all edges are glued down - dry - add Stickles Glitter sparingly to add a shimmer - dry.  Finish with Glittered Ribbons and a large leaf patted down with a bit of Stickles - you can raise the stem just a bit and glue the leaf under it to secure - enjoy!

The second project used all of the same stamps, collage papers and stamped tissue - this time to decorate a plain chipboard album cover and accompanying pages.  What a fun little scrapbook for kids in costumes through the years or a special party - have fun with this one!
And here is a peek at the inside pages - many have TJ prints as accents:


I will be featuring Jill's Vintage Santa Clause, Christmas and 12 Days stamp sets and collage paper packs in a month or so, stay tuned.                         Bye for now, thanks for coming by!   Kay

September 13, 2014

Halloween Classes

I am excited to share with you two upcoming classes at Whim So Doodle in St. Petersburg, Florida featuring limited edition Halloween projects.  Kits are available if preordered from the store by Wednesday before the class date.
The "Boo Album" will be Friday night, September 26th from 6-9 pm and features a mix of traditional papers and die cuts - my thanks to Suzette L. for getting us the awesome 3D witch embellishment for the clear covers:

The 2014 Halloween box will be on Saturday, September 27th from 10 am - 3 pm and features a Tim Holtz Configuration and lots of dies and goodies inside:

Link, details and registration information can be found under "Classes" - Whim So Doodle in the right column of this blog.  I look forward to seeing you there for a spooktacular time!

I would also like to reach out and thank those of you who let me know the "Comments" portion of posts was not working - we hope it is fixed now, my blog guru will be here next week to make sure! Please know that I welcome your comments and suggestions and can also be reached by email under the photo and profile.

Thanks for coming by and best always!     K

September 10, 2014

CC3C Assemblage Clock Challenge

I am delighted to present you my interpretation of the latest CC3C Challenge #10 - based on Tim Holtz Compendium of Curiosities III and hosted by Linda Ledbetter Studio L3 at cc3challenge.com.  I have been following these challenges and enjoying the works of so many creative individuals, thank you Tim & Linda for the opportunity to share and be inspired!   The chance to post on my "new" blog is finally here - so here goes.  I LOVE shadowbox projects and the depth of this clock was perfect to multi-layer and give the appearance of an underwater reef:
The clock body and parts were painted with a layer of gesso - dry - broken china crackle paint (I still had some stash) - dry - brushed corduroy Distress Stain to accentuate the cracks - dry - then a coat of Ranger matte multi medium to seal.

Seems photographing this project was the hardest part - here is one before it was placed into the clock body.  The seaweed layers are cutout color transparencies on a paper background, layered with shaped paper cutouts of sealife, then real sand and shells glued on a tag stock base for spacing.

Here is a close up of the top embellishment, Tim's inked crinkle ribbon, frayed linen ribbon, cash key filled with more sand & shells using glossy accents and a type charm filled with a large rhinestone and stickles on a chain. The word band letters are "smeared" with Broken China distress paint, wiped clean & dried - the band is secured to the clock handle top with linen ribbon tied & glued on the back.

I hope you have enjoyed this project and I look forward to sharing more challenges with you - please join us for fun, fellowship and a wonderful learning experience!
Bye for now - K

September 8, 2014

Vacation Journal

Before we get into the "big three" end of year holiday seasons (Halloween, Thanksgiving and Christmas), I wanted to share with you my summer journal made using a Tim Holtz Worn Book + Tag page protectors and his new Sand & Sea die.  The colorful pages could be used for both journaling and photo remembrances, adding memorabilia or whatever trinkets & tidbits you collected on your journeys.

Use Tim's Burlap Layering Stencil with texture paste for the covers.  To create the signature oval on the back cover, use a trimmed address label before applying texture paste - once applied - remove the label and your "space" has been left open - can be any shape or size.

After the texture paste has dried, daub on  Broken China and Antique Linen Distress Acrylic Paint.
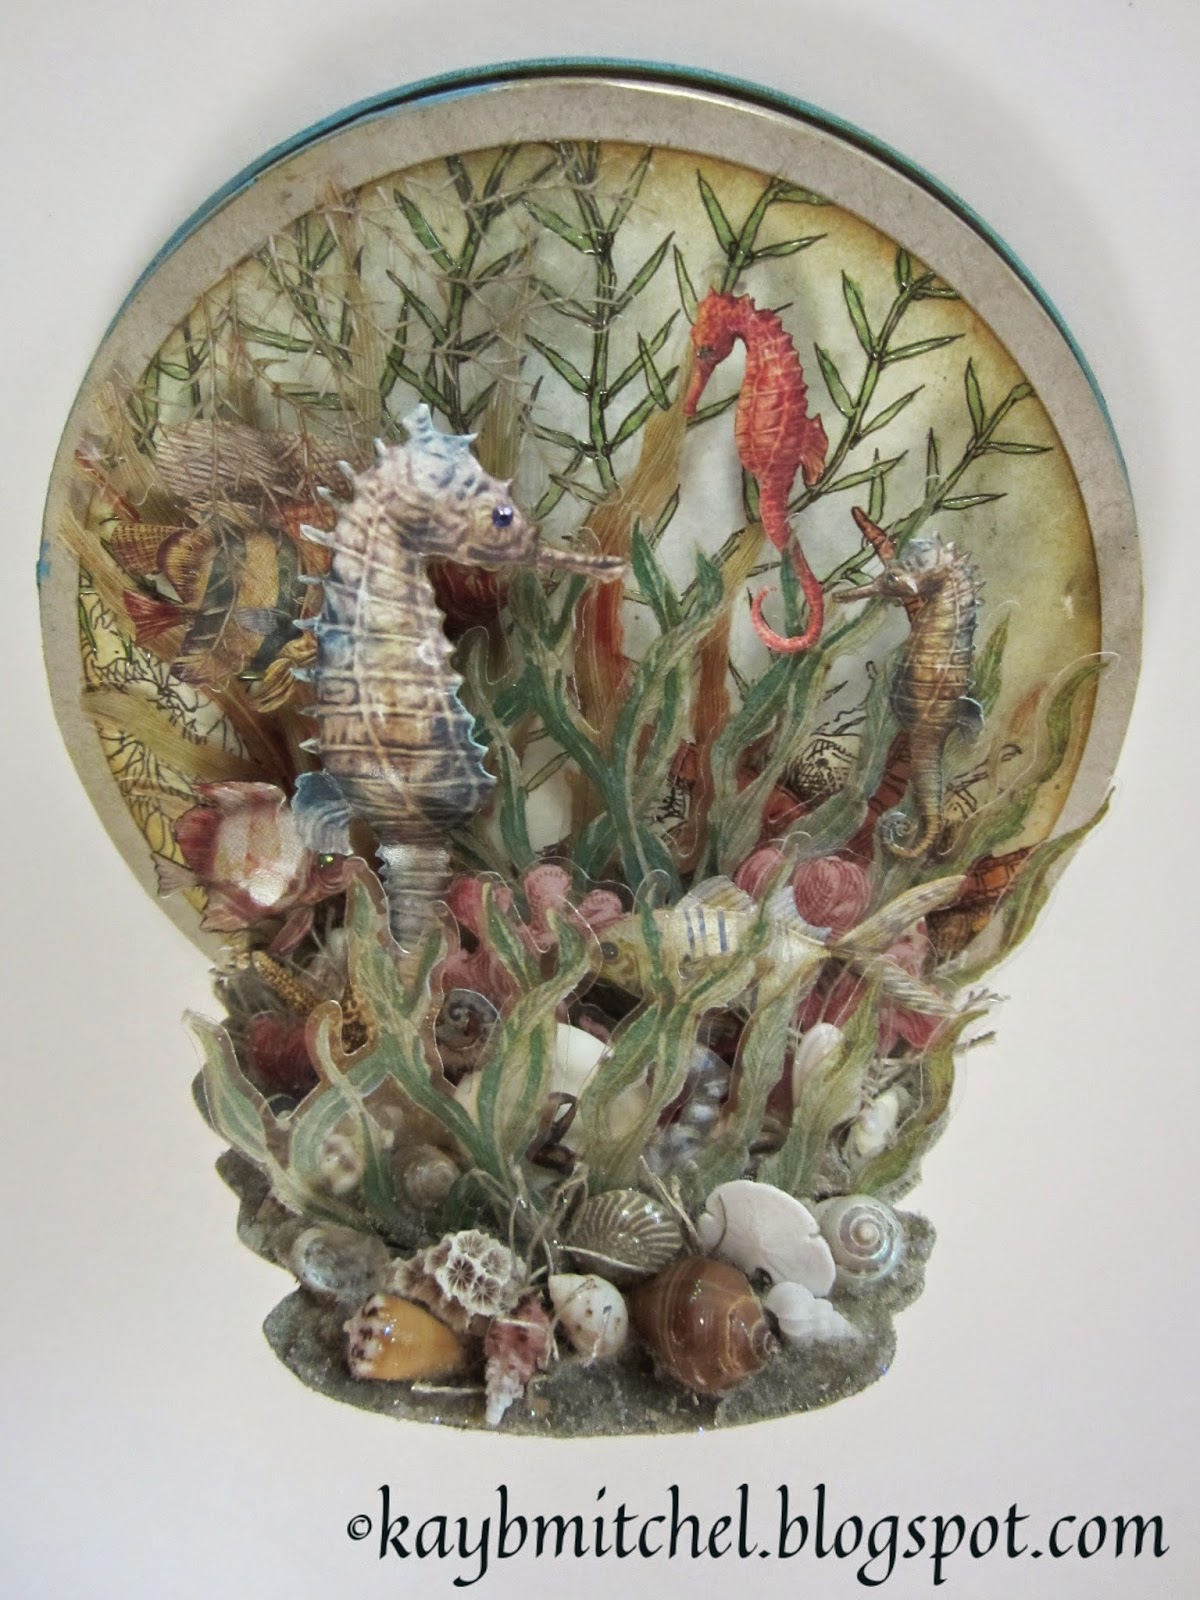
Seahorse die cut is painted same colors + Adirondack Snow Cap  on edges - dry - coat with Clear Rock Candy crackle paint - dry - Distress Stain in Pumice Stone.  Starfish are Antique Linen crackle paint, stained with Brushed Corduroy and Sand Dollar is Picket Fence crackle paint stained with Pumice Stone.  White highlights on all are made with Picket Fence Distress Marker.  The sea grasses are die cut from Sizzlit - Spring Greenery, a bit of real fish net, rhinestone embellishments and stardust Stickles are added to accent.

For the inside of the cover before you add the metal rings, use Weathered Wood Distress Paint and the Woodgrain Layering Stencil. Distress Ink the edges in Brushed Corduroy and Vintage Photo.

Color pages were cut from Tim's Core'dinations textured cardstock with coordinating die cuts of Sand & Sea.

To accent the pages, use the Burlap and Woodgrain Layering Stencil with Pumice Stone and Brushed Corduroy Distress Inks:
Diecut additional pieces of the Sand & Sea images in page colors, ink edges and add throughout the book.  The smallest sand dollar and starfish are made using a Martha Stewart Punch. The reinforcements are the less expensive paper ones (not shiny) which saturates the ink on both sides.


Use the Movers & Shapers dies to create dividers - a contrasting shade of paper was added to the backs to both stabilize and accent.  You could also use the new Shadow Press - Expedition Set to emboss then ink select pages.

The most fun was making tags to fit the page protectors.  Begin by cutting 110 lb white cardstock then use marbling techniques to colorize each, in combinations and layers of all the blue Distress Inks, plus a bit of Peeled paint for green hues.  Use inked paper reinforcements again at the tops and crochet cotton ties approx. nine inches long (ink like you would crinkle ribbon) to complete:

For a final page addition I stamped Project Life journaling cards with Stampers Anonymous - Nautical Blueprint "masked" images (the architectural linework is hidden).
To finish the cover, add inked cream cardstock with the book title stamped in place, then a bit of spritzed Distress Ink Markers - Picket Fence and Iced Spruce.

I hope you have enjoyed this project and I look forward to sharing many more in the coming days. Thanks for stopping by - best always!    Kay

September 3, 2014

Steampunk Seat

Arts in education is a major concern throughout the country, with so many teachers and supplies being cut during the past several years. As art minded people, we realize how important it is for children to develop their creative side and we should strive to do whatever we can to create awareness and help in some way.  I had the opportunity to work with 30 other selected artists in North Central, Florida to "decorate" a salvaged oak library chair from the school warehouse.  Each of us could do whatever we wanted and I chose the Steampunk theme.  The chairs were auctioned off to benefit school arts programs and fortunately mine went to a wonderful home in the North Carolina mountains with a School Board member.  I used lots of Tim Holtz stamps, papers, die-cuts and gears, plus some Graphics 45 papers. Here it is featured in the recent edition of Steampunk Magazine - enjoy and thanks so much for visiting the blog - best always, Kay

Thank you Steampunk Magazine for featuring the chair!

Looking top down - shows the matching oak lift-lid storage box my super cabinet maker, Tom McCallum,
built and added to chair back - with a piano hinge to open - thank you Tom!