January 24, 2020

Valentine Box of Delights

Its been a very busy year and I have thought of all of you often, time to get back to blogging more to share with you some of my favorite projects - a 2020 News Years Resolution!

To start us off, I have a Valentine Box made to share in my classes at Anna Griffin's CREATE V in Atlanta last fall.  Everything except the actual box is from Anna's incredible product line, some from my saved stash and some still available on her corporate website - be sure to check it out - www.Annagriffin.com   The box is Tim Holtz Idea-ology Configuration #TH93078 and measures 9"x 12" overall.  The papers, cutting dies, gold paint, Dresden, embellishments, washi tape and ribbon are all Anna Griffin.  It would probably take a book to go through each module piece by piece and I always suggest you add your own personal touches to any project - some basic steps and guidelines are outlined below, and pictures are worth a thousand words, enjoy ............

Here is the box front overall and close up of center embellishments.  There is a "double" doily diecut in the background which was made cutting 2 pieces of the same paper with same die, then using a craft knife to trim straight at center and placing edge to edge creating illusion of one really big doily:
 

Here is the inside of the cover along with a close up of the decorative pocket which was again 2 of the same corner pocket die cut, overlapped and glued together to create a larger element - the cupid embellishment hides the overlap.  NOTE - for extra strength, secure the pocket in place using a heavy duty double-sided tape (Scor or similar):

Here are some basic steps and guidelines:
STEP 1 - open and remove all the smaller inside boxes, then paint the outside "middle/book" of the box with Anna Griffin Metallic Gold acrylic paint (by Plaid), allow to dry.
STEP 2 - measure, select and cut paper pieces for the front cover, inside cover, back and spine - save all smaller "scrap" pieces of paper for possible use on inside.
NOTE - RIBBONS - two 1" wide, 18" long pieces of light pink double-faced satin.  It is important to secure the ribbons in place before gluing papers down.  Measure and mark lightly with pencil the center of both inside cover and box front bottom, then glue one edge of ribbon in place - you may have to slightly pry open (with a dull kitchen knife) the bottom area to slip ribbon in, then glue it back together - you can see from the photo that the ribbon goes under the open box front.  The inside front cover paper will cover the ribbon edge.  Adhere papers using either Xyron, paper glue or your favorite method, be sure to smooth out all bubbles to flatten these larger areas.


STEP 3 - begin to decide what papers you want to go into the small inside boxes. I have found the best way to "cover" these is to FIRST cut a strip of paper that will fit onto the sides and overlap at least 1/4" into the bottom so another piece of paper can be cut to fit the bottom and cover the cut edges.  Paper scraps are great for this part - NOTE - the paper strip does not overlap the top edge of the boxes, washi tape covers it.  Cut and adhere (I used paper glue) all papers to insides only of all the small boxes - allow all to dry and/or rest.  Don't forget to stop occasionally and take a breath, this is the most time consuming part of the project and I spent parts of several days so I wouldn't burn out - just saying!
STEP 4 - assemble and hot glue down the small boxes back into the larger base box.
STEP 5 - use washi tapes to cover and join the top edges of the boxes as well as the outside edges of the cover, back and spine as shown in the photos.  NOTE - washi tapes sometimes lose their stickiness, however, you can apply glue or clear mediums with a brush underneath the tape and smooth into place so they will dry and adhere - IF they are still loose, reapply the medium and smooth back down, especially where they overlap and at corners.  Allow to dry.
STEP 6 - here is the really fun part, loading up the small boxes with fussy cutting, parts and pieces of die cuts, Dresden bling and whatever your hearts desire.  Mine include those from Anna's Valentine Stickers and Wedding Toppers as well as Favorite Flowers - you can always cut embellishments apart to fit - just have fun with it!  Stack and use foam squares and/or dots to create different elevations.  Here are close up photos overall and of each box:


The CENTER Cupid vignette is 2 layers of paper, top diecut is "elevated" by gluing sides into already covered box.  Also note how cut pieces of Dresden gold have been added throughout:


April 12, 2019

Easter Elegance 2019


Easter is just around the corner and this weekend is a great time to finish up your whimsical cards for kids, grand-kids and kids at heart.  I am happy to share some of my favorite bunny and basket cards this year using Anna Griffin kits, dies and embellishments.  The first two are from the easel kits - however - you can use those same "card fronts" on a regular 5"x 7" card base.  Enjoy .........


January 20, 2019

Valentines for 2019

Valentines are always a favorite for lovers of "Victoriana" and Anna Griffin papers, cutting dies and embellishments embody the beauty of the original cards and make them easy to duplicate.  These are some of my favorites this year, starting with the newest "Swivel & Pop" cutting die. I also used the Vintage Heart 3D Embossing Folders & Dies as well as the Valentine Doily Dies and a new 6"x 6" Perfect Pattern Card, all with the Vintage Valentine Cardstock - enjoy ........


December 18, 2018

Anna Griffin Holiday Windows and Doors

So here we all are in the midst of finishing up our holiday shopping and preparing for visits from family, friends and Ole St. Nick.  The Anna Griffin Design Team has been busy creating samples of wonderful NEW products airing on HSN January 8th - stay tuned for more "beautiful in the making"!  I am working on project prep for the upcoming March Cruise - there are still seats available, please see earlier posts for info and 800 phone number to inquire, price varies on cabin selection - its going to be awesome!
As a last share before Christmas, I send you some of my favorite diecut Windows and Doors, along with my very best wishes for each of you to have a Merry Christmas and Happy New Year!


October 5, 2018

Vintage Christmas Diecuts

Anna Griffin Vintage Christmas Diecuts for 2018 combine beautiful Victorian images with holiday foliage to create wonderful cards for your family & friends.  These two cards used multiple layers of the pre-punched diecuts, cutting and rearranging to create additional dimension.  The "frame", on the card with a child decorating a tree, has added corner bows.  The Santa has multiple layers on his arms and packages.  Adding diecut frames and embellishments further enhances the overall composition - enjoy!
 

PLEASE SUBSCRIBE to this blog to receive future posts and technique instructions - thank you!

September 12, 2018

Halloween Happenings

I find Vintage Halloween images both fascinating and beautiful - it is always interesting to see how our forefathers interpreted the holidays with dramatic graphics and bright colors that Anna Griffin brings back to us each year.  With the popularity of "easel cards", I created a black cardstock shadow box, then added elements from both the Vintage Halloween Card Kit and her newest Halloween Die-cutting Set, the New Easel Hinge Die along with a Frame Die, Word Die and Tag Dies for the sentiment. TIP - sometimes I make a "template sample" of 3D cards out of scrap cardstock (a piece I will never use - LOL) just to be sure my measurements, scores and folds are correct - I always have it as a reference.  Remember to create multiple layers for special effects, experiment, play and enjoy!

Above is a close up of the card front, below shows side view with easel back.  Begin by cutting the black cardstock large enough to score 1/2" inch for all sides plus 1/2" to wrap around front/top - basically your card size plus one inch (this is a standard 5"x 7" card so my cardstock piece was 6"x 8").  Score all four sides 2 times at 1/2", then fold to form a box shape, next clip the corners to fold into box ends - NOT a triangular corners - adhere and/or paper glue corners to shape and secure.  Add the center back print to box - this was a small print and needed to be moved upward to fully see, the fence covered the open area below.  Next, add your fencing with foam squares on top of the background, then the front frame, which has been added to another piece of black cardstock, center trimmed away, then adhered to the box frame top.  Additional embellishments, pumpkins and bats are adhered into place where desired - enjoy!  NOTE - fine lines on embellishments were freehand using a 008 fine line permanent black pen, bat eyes were done with a white gel pen. Enjoy!

Some of my personal favorites from this years Dies collection:

Here are some personal favorites from last year's card collection:
     

July 26, 2018

Embossing with Cutting Dies

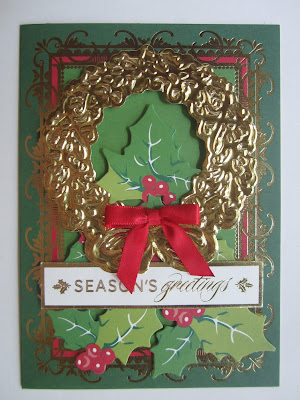
With all of the beautiful new foils that Anna Griffin now has available, along with her large variety of cutting dies, I am pleased to share with you a technique she asked me to teach at her Create Event in Atlanta last November, using the ever popular Cuttlebug.  There are a variety of these type techniques, this one works best with symmetric designs (same on both the right and left sides) and accompanying concentric (background mat/shadow layer) cutting dies, as detailed in the instructions below.  I do hope you will share and use on your upcoming holiday cards as well as throughout the year.  Enjoy!

Step #1 - choose your cutting die - I know I am repeating myself, but this is most important - a die set that is symmetric (the same on both right and left sides) with the accompanying concentric (background mat/shadow layer) and a piece of the foil color cardstock you desire.  It is best to use the heavy weight Anna foil cardstock as it will not tear so easily when embossed in this way.  Cut the foil to completely fit over the die.

Step #2 - cut the mat/shadow layer first as you normally would, shown below:

Step #3 - place the matching decorative cutting die, with cutting edges up, directly on top of the thick, white "A" Plate, then the mat foil cutout face down on top of the decorative die - remember there will be a slight edge around the mat piece which is larger than the design die - a bit of washi tape will hold it in place without harming the foil surface (photo to left below):
Step #4 - stack the plates and material in the following order bottom to top (as shown in photo to right above) - A Plate - design cutting die with edges upward - cardstock mat/shadow layer face down -  green rubber mat - B Plate, another B Plate - roll through the Cuttlebug.

Step #5 - remove the stacked plate layers and carefully retrieve the "embedded" cardstock out of design cutting die as shown below.  IF any part of the design tears, turn it to the back, smooth down a bit and tape over.

You should now have a completed embellishment.  Here are some additional samples using Anna's wonderful Christmas Embellishment Dies.  I have also made cards using the Frame Dies, as well as a Valentine card which required "fussy cutting" because they do not have a matching concentric mat/shadow layer die, another option for you to consider.  Remember perfection sometimes take practice, enjoy the process!