October 29, 2014

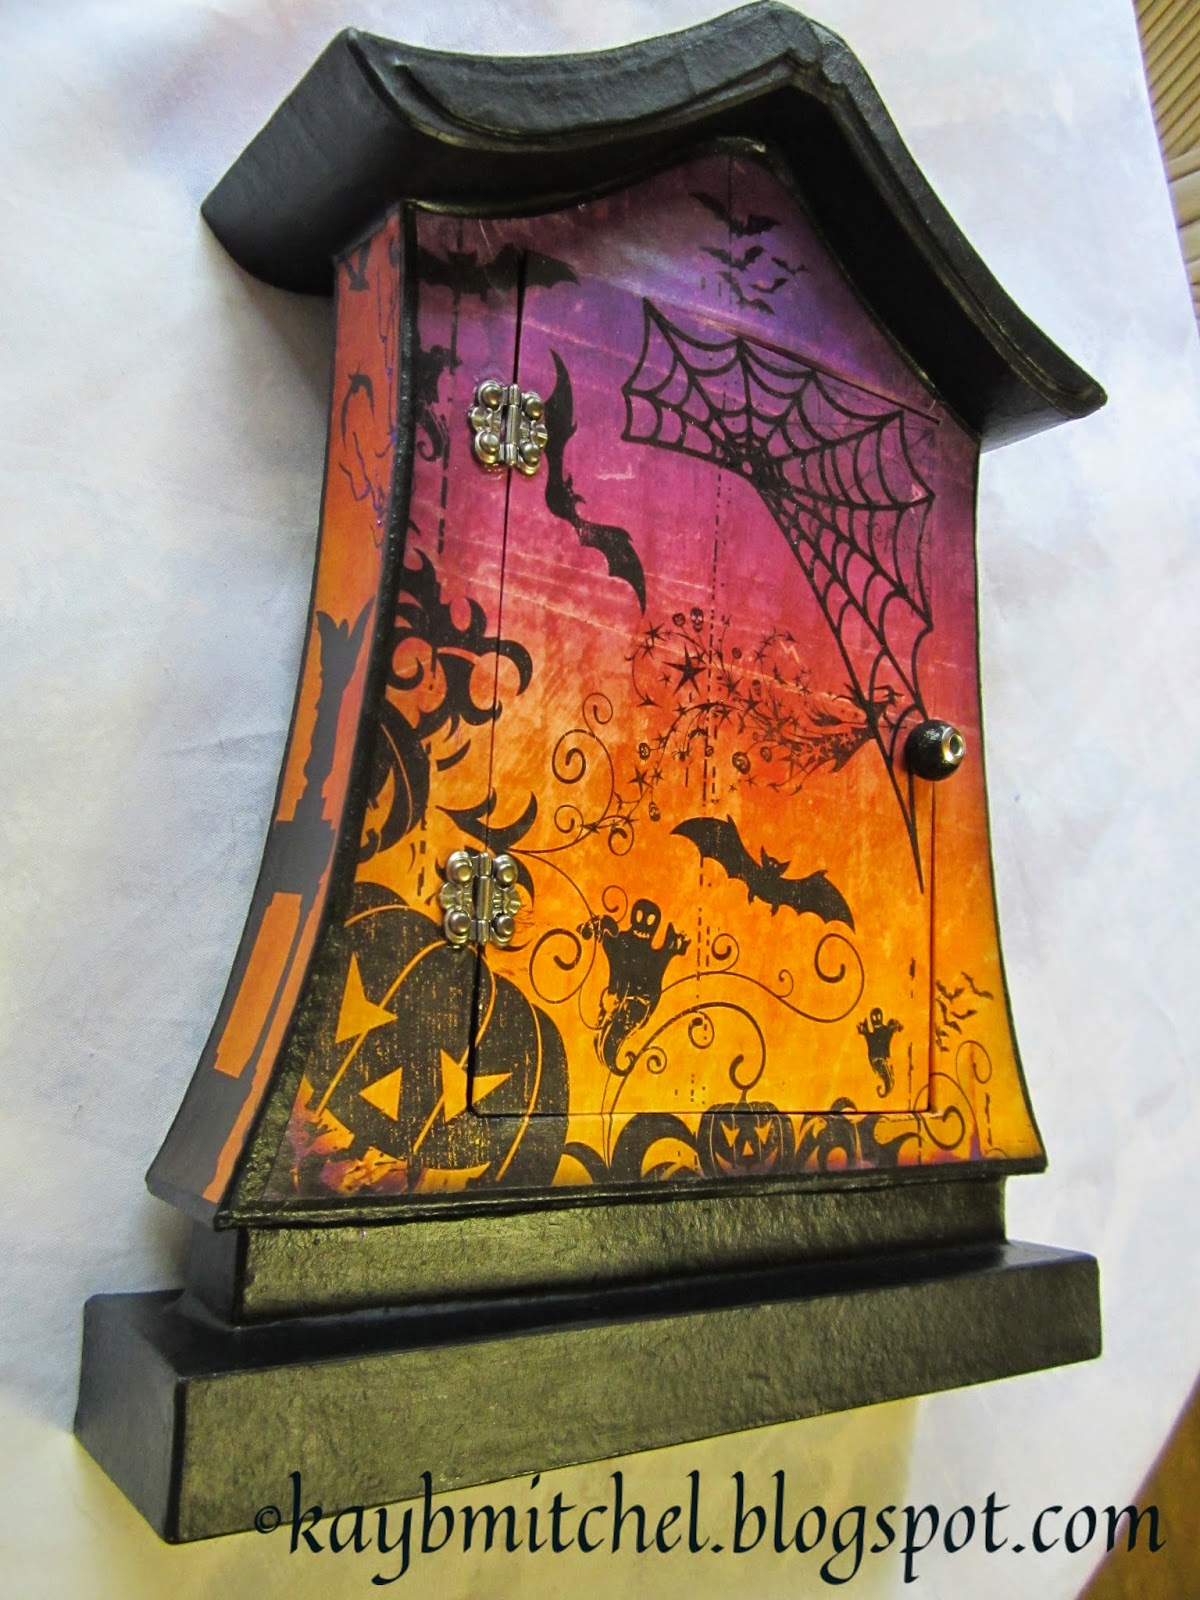
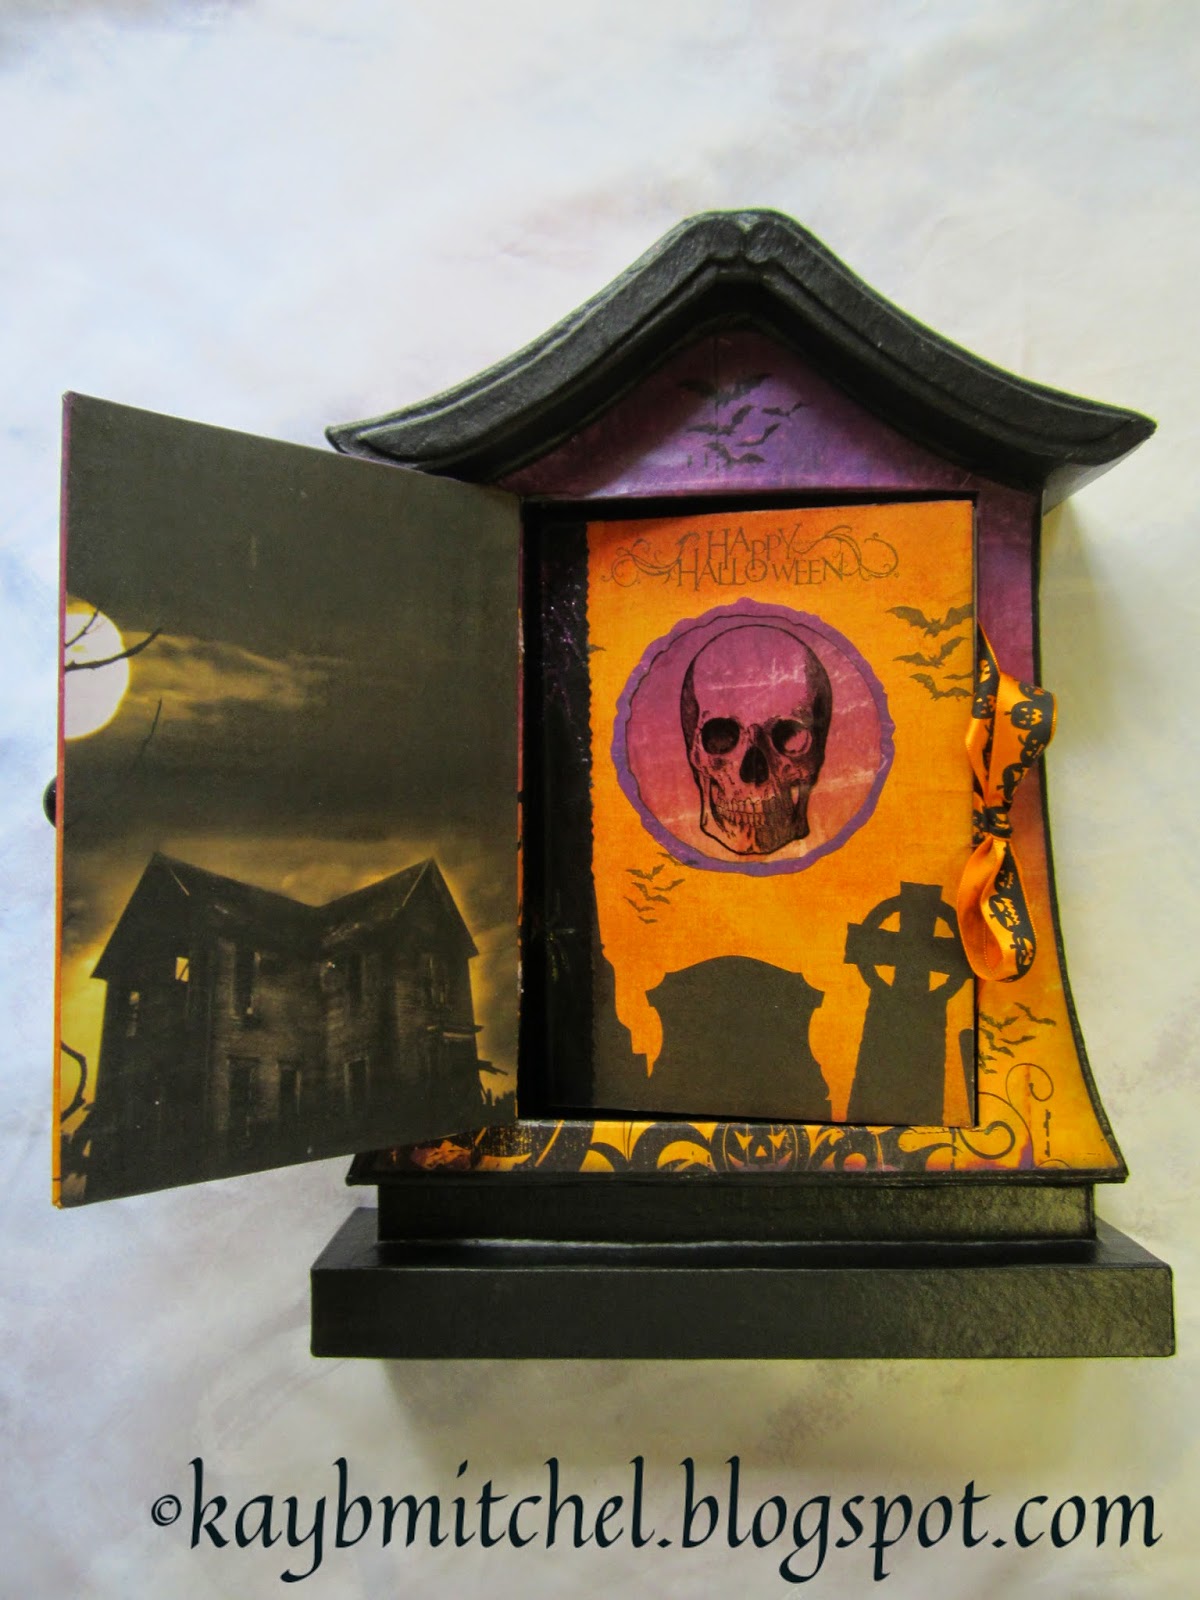
Halloween Hidden Album

Hello all - I know many of you are busily preparing for the upcoming All Hallows Eve to enjoy with family and friends, I wanted to share a project "salvaged" from an after holiday sale bin, I found a battered paper mache tombstone (approx. 8" x 12") that needed its seams re-glued, but the all seeing creative eye visioned room for a album coming out of the center - sometimes we scare even ourselves.  I plundered through my paper stash and found some really graphic designs that could be accented with additional stamp images and thus created this decor piece to hold trick-or-treat photos of grandchildren - have a safe and bootiful weekend!
               

The REALLY proficient will figure out how to make one of these from scratch (lightweight chipboard and brown craft paper - use a hot glue gun and Ranger Glue-n-Seal to put together), however, you might find one on line or lurking around this weekend, waiting for you to purchase. Determine the size of front door you need, then use a SHARP craft knife and steel edge ruler to cut the door shape out of the front panel - if you mess this up, use a heavy piece of chipboard cut to replace the door (guess who did this!)  You will also measure and cut four heavy chipboard pieces to form the inside "side panels" of the inner box area and glue them into place with either a hot glue gun or heavy paper adhesive (shown below) - dry - paint with Block Soot Distress Paint - dry.


Determine the paper pieces you will use to cover all, then measure (roughly sketch) and cut - note the black base piece still shows on the edges so you do not have to be exact.  I used two of the same papers for the front so I could wrap and glue the edges - both around the front door and into the sides of the box.  If you only have one paper piece for the front, remember to separately cut-save-glue the piece that covers door so it will match the front of the box - dry.  Add stamps, embossing or diecuts and seal - dry - add Stickle colors to accent printed images.  Remember NOT to add a mat sealers over Stickles or it will take away the shine and bling!  Glue on hinges and a large bracelet bead door knob using Glossy Accents.


The album is made using heavy double-sided scrapbook papers cut accordingly to the size you need - corner round the outside edges and Distress Ink as desired.  The cover is made using a base piece of lightweight chipboard - the front paper has a circle cutout with stamped skeleton image protected by a piece of transparency sheet, glued at the edges into place.  Add a ribbon tie glued between the chipboard and the first page.  The rest of the pages are glued together back-to-back, several pages have a fold out glued between papers at the side seam. The last page is glued to the back cover of a second piece of lightweight chipboard - insert the second ribbon tie and glue between the paper and the board. Cover or paint the outside back of album.  A "spine" piece of black cardstock has been added to the outside of the album to cover up the edges of the glued pages - voila - you're finished.

Your comments are always desired and appreciated - thanks for coming by!   K

October 24, 2014

International Quilt Market

As a seamstress since the age of 10, at my Grandmothers knee making doll clothes, I am pleased to honor the International Quilt Market in session now in Houston, Texas.  I too believe that many "crafters" would like to venture into the fabric and sewing side, so I combined the two processes in panels of Tim Holtz Eclectic Elements Fabrics by Coats AND Tim's many "idea-ology" metal embellishments by Advantus.  These two pieces were recently featured in Somerset Haute Handbags - where you will find complete instructions and lots more detailed photographs - thanks for stopping by and enjoy!   K


A close up for you:


A close up for you:

October 14, 2014

Fun with Wendy Vecchi

This past weekend at Pictures In Time in Fleming Island, Florida, many of us had the privilege of taking classes with Ranger Signature Designer, Wendy Vecchi - it was AWESOME!  Her new inks, embossing powders, stamps & embossing paste are great and blend beautifully with other Ranger products, particularly those of Tim Holtz.  Add this with her personal signature line of Art Parts and fun, easy, gorgeous techniques for your crafting and fine art projects.  Here is but a small sample of what we worked with, please add Wendy to your "have to have" list, she can be reached at studio490art.blogspot.com or wbv1213@me.com.  

We were a little tattered & tired but grateful to be sharing creativity and friendships - thank you Wendy!
                                            

October 9, 2014

CC3C Challenge 12 - Distress Photo Tinting

Hello again, I settled back into the studio for a few days this week to finish my offering of the latest Tim Holtz CC3C challenge, a multi-layer combination of several surfaces using the Wallflower paper stash. Thanks to Tim, Linda Ledbetter at Studio L3 and the Funkie Junkie Boutique for sponsoring a showcase of our creative endeavors - I hope you enjoy:

"In The Garden"
My vision for this project was a little girl looking out a window into the backyard to see her siblings in the garden.  I used the Found Relatives cards from both the original "deck" and the new Occasions edition.  Photo tinting goes back generations and was first done with oil paints - one had to go to school to learn how - today using Tim's Distress Ink Markers to colorize, make it easy and fun!

To get started, trim cards (or photos) to desired shape and color to desired shades with ink markers.   I used lighter shades on the big photo in the background and stronger color on the images in the foreground. OPTION - cut along the chin line of the larger photo, color the paper edge with the Pumice Stone ink marker and insert foam dots to elevate the face - why - I wanted allot of dimension on the overall project and this just "added to".

To prepare burlap panel, cut a piece of Wallflower vellum to fit top, then trim edges with deckle edge decorative scissors (or trimmer).  To secure vellum to burlap without adhesive showing through or peeling back, I used a Xyron machine - peel and stick.  I LOVE how the burlap shows through the vellum to give an extra dimensional layer.  Use Distress Ink pads to rub and tint the burlap edges, matching ink colors to those found in the papers.  This example is not the piece I used because the image was hidden too much so I saved it for another project another day - use one of the smaller prints:

Now, carefully separate the cabinet card along the top and side seams with a craft knife - this will open up the card to insert the window.  Use recycled packaging OR Bazzil Plastic Paper to cut and shape the window "box":
 
Measure window size and add 1/2" to all sides - cut out - score all sides at 1/4" and 1/2" - cut out corners.  Turn cabinet card over to inside and place adhesive tape around opening - insert window and press to secure in place.  Photo shows that tape can also be placed on the outside window edge and inserted into the card opening - either way works well.
Prepare the garden flowers and greenery by "fussy" cutting flowers from both the Wallflower paper and vellum pads in the quarter page and smaller sizes. I also LOVE the way vellum flowers blended into the overall garden and accented the paper ones.  I diecut Tim's Sizzlits Tapered Fringe (Core-dinations card stock) for grass and Spring Greenery; the Butterflies were cut from paper.  I learned in my days of decoupage to color the edges of ALL paper cutouts with matching colors of ink markers to unify and blend - white edges are just not my thing and very distracting.

Measure matching paper piece to fit inside the cabinet card and attach large photo, flower, greenery and butterfly elements - use foam dots to elevate.  Add a word band tied with inked crinkle ribbon (try the new Distress Stains to ink ribbons faster) and add heart charm to top - place inside the OPEN cabinet card then glue or tape the card top down on top and sides - use small binder clips to hold in place until the glue dries. Glue the finished cabinet card collage to the burlap panel:
Now position the smaller photo images and glue onto the background with foam dots - I use either Glossy Accents or a hot glue gun to do this - the "level" of this element should be as high as and rest on the window box corner.  Arrange and glue on the remaining greenery, flowers and butterfly to finish. 
The finished panel can be framed or a custom box made to fit and display.  

SUPPLIES: (Thanks to Anna Karin for listing at each project - its a great idea I hope to remember.)
Surfaces: Tim Holtz idea-ology Wallflower paper stash, Wallflower Vellum stash, Bare Burlap panel, Core-dinations card stock
Dies: Sizzix Sizzlits - Spring Greenery, Tapered Fringe, Butterflies
Ink: Distress Ink - Worn Lipstick, Peeled Paint, Mustard Seed, Frayed Burlap, Vintage Photo
Ink Markers: Tattered Rose, Worn Lipstick, Shabby Shutters, Peeled Paint, Mustard Seed, Wild Honey, Pumice Stone
Adhesives & Mediums: Ranger Glossy Accents. Xyron for vellum, 1/4" Scor-Tape, Foam dots
Embellishments: Tim Holtz idea-ology Cabinet Card, Found Relatives cards, Adornment - Heart Charm, Word Band, Crinkle Ribbon

Many people have asked why I do so many projects in shadow boxes or "protected" elements - fact is - I have three beautiful cats who like to pick at and get into my projects so I try to protect them once they are finished.  Thanks for coming by and following my work as it evolves, I hope you will share this site with like minded souls!   Bye for now - K
 

October 6, 2014

Christmas Classes

My last classes of 2014 at Whim So Doodle will be this month, October 16th & 17th, and feature the following two holiday projects.  To register for class OR order a kit, go to the Whim So Doodle blog on right under Classes - we look forward to seeing you there or fulfilling your orders.

The NOEL Box and 13 page album features a Tim Holtz book box with his Merriment holiday papers, die cuts, embellishments and even some pocket pages to tuck memorabilia inside. All kits have color photographs and complete instructions included.

The Silver Tray Holiday Album features Teresa Collins Tinsel & Company papers all in white, gold & silver, some pre-stamped in metallic's, uniquely adhered into a silver plated tray.  This is a favorite for your family photos, entry table or hostess gift.