Living in a coastal state, I love all papers associated with beaches, nautical and images related to the ocean. Graphic 45 has produced some of the most beautiful papers on sea life through the years and this collection has become one of my favorites, especially the outlining for us as a fussy cutting guide! This is the second album I have shared with a shadow box top, I have three cats that love to "pick" at dimensional embellishments, so encasing multi layers of cutting provides me the safety of preservation. Other elements, real shells and sand, could also be added, remember these albums live in your house and should be made using your preferences, creativity and design elements as well. The album size is 8 1/2"x 11"x 1" premade heavyweight kraftboard 3-ring binder with sixteen (16) removable pages. I spent extra time in cutting the prints for and engineering the top, but found it well worth the patience and effort - enjoy!

Here is a peek at the deluxe paper collection, both 12"x 12" double-sided patterns and solids (I used the 8"x 8" papers for extra flower cutting and cards), cover-weight stickers, cardstock diecut embellishments, journaling & ephemera cards. I also used large & small G45 tags. A complete supply list is at the end of instructions.
COVER PREP - since this binder is pre-made, it is only necessary (if desired) to cover the outside edges with coordinating heavyweight cardstock - the same as you will use to assemble pocket pages and photo mats. I match craft acrylic paint with the cardstock color by daubing a bit on the inside, allow to dry, if it matches - paint around the inside metal spine, every corner front and back and in the center back as shown in photos below.
COVERING EDGES - to be sure, I measure the outside edges of the binder and cut the heavyweight cardstock strips the length x 1" wide to glue on over the edges (photo below) - printed papers will cover the rest.
NOTE - do NOT score these strips, rather, glue or ScorTape on one side, then fold and bend them over the binder edges as you glue or tape down the second side. On the corners, trim cardstock at a angle as needed then smooth down to secure, the paint underneath will keep any kraftboard from showing and can be touched up if necessary.
ADDING RIBBON CLOSURE - measure and mark the center point of the cover, on the OUTSIDE, then cut the 1" wide navy ribbon into two 15" pieces. Glue one end on the OUTSIDE cover at center mark, let glue set up then cover ribbon end with tape to secure - do both sides (photo below). The exposed ribbon ends will be covered with printed paper. Ribbon can be trimmed later if too long.
COVERING OUTSIDE SPINE - To cover and reinforce the spine and top edge behind the metal rings, first glue on a 3"x 11" cardstock piece to the outside cover -
NOTE - do NOT try to curve this piece over the edge, in fact, trim if necessary to be flush with the top edge. To finish, add two pieces, 3"x 2" one at top and one at bottom, OVER this outside spine to cover the edge and go behind the metal on the inside (both photos below).
CUTTING PRINTED PAPERS - first remove two of the cover paper piece and set aside, next one dark piece for the cover back, then remove papers that are printed to cut into decorative cards, journaling and other embellishments. Each page has been photographed (below) as a guide, however, you can mix and match to your hearts content once these main pieces have been identified. Not all of the printed pieces are cut into pages, here are the measurements:
COVERS OUTSIDE front and back - two pieces 9 1/2"x 11"
COVERS INSIDE front and back - two pieces 6"x 8" - NOTE - these shorter pieces go behind the large pockets and do not need to be a full size as the bottom ends will be hidden.
PAGES - eleven pieces 8 1/2"x 11" (NOTE - the large pocket and fold-out pages are made using solid cardstock - measurements below) all corner rounded and 1/4" 3-ring hole punched
POCKET PAGE MATS - five pieces 7 3/4"x 10" and one piece 6"x 8"
The following printed paper pieces are cut from "scrap" after cutting the cover and page pieces:
SPINE outside - one piece 1 1/4"x 11"
FOLD-OUT PANELS - two pieces 3"x 10 1/2"
WATERFALL's - eight pieces 3 1/2"x 6 1/2"
TAGS - two pieces 3 1/2"x 7 1/2" (for large) and two pieces 3 1/2"x 4 1/2" (for small)
SHADOW BOX SIDES - two pieces 3/4"x 9 1/2" and two pieces 3/4"x 11/1/4"
ALWAYS SAVE extra pieces for border punching, decorative page strips and tabs
CUTTING PATTERN/SOLID PAPERS - these are cut from the matching double-sided G45 paper pad of "Patterns & Solids" NOT the heavy navy cardstock:
COVERS INSIDE - for front and back, two pieces 9 1/2"x 11" corner rounded
POCKETS - inside front and back - two pieces 9" x 5 1/2" (to accommodate large border punch)
POCKET PAGE MATS - two pieces 7 3/4"x 10"
WATERFALL MAT/BASE - 4"x 8" corner round vertical bottom edge only
the SOLID side of these papers has also been used for many of the photo/journaling mats throughout - sized 5"x 7" and 4"x 6" - use the page photos as a guide or save to size when photos are added.
CUTTING HEAVYWEIGHT CARDSTOCK's - the Ivory, Coral and Navy (same as used on the cover edges):
POCKET PAGES - two NAVY pieces 8 1/2"x 12" and two piece 8 1/2"x 10 3/4"
FOLD-OUT PAGES - two NAVY pieces 11"x 12"
POCKET PAGE INSERTS - two CORAL pieces 7"x 10" both corner rounded
MATS for Photos/Journaling - 5"x 7", 4"x 6" and 6"x 6" some border punched, most corner rounded
USING PUNCHES & TABS - having a large punch stash can be both helpful and a weakness, you just have to use them when you can - thus - I pulled out the "coastal" ones and added them to this project - use what you have to justify keeping them. I used a large border punch on pockets, another as strip, small ones on photo mats and embellishments and the tabs for each page - all have been inked.


COVER PAPER - when choosing a FRONT COVER paper, I look for the maximum amount of detail and design work before cutting, as it becomes more or less the centerpiece of the album. Sometimes I even cut a blank paper piece to put over the print so I am sure it will be where I want it. Once the pattern has been decided, use either ScorTape and/or Art Glitter Glue to secure the paper to the front & back covers, over the ribbons. NOTE - do NOT corner round the cover paper (I did and it almost showed up under the shadow box frame - just saying). Photo below shows how ONE, the base cover paper was cut - the second cover piece is cut apart and used for fussy cut layers. The BACK COVER paper has been both corner rounded and a small oval cut into the center which I will use to sign and/or dedicate the album when finished, it is dark so it won't show dirt so much.
INKING - I use either and/or both Distress and Distress Oxide Inks (with sponge applicators) to accent the edges ALL printed papers, pre-printed cards and solid light color cardstock mats. By mixing ink colors (use two or three on each), you blend to soften and accent the overall look of the papers - experiment, but don't get heavy handed and cover up your beautiful prints. Another item I ink for any papers mounted on metal rings is
MATTE REINFORCEMENTS - "pounce" on the same ink colors then peel from backing and apply to front & back of pages before inserting them in the binder. The reason is simple for this one, it keeps the pages from tearing with use.
NOTE - it is important to use ONLY the less expensive MATTE reinforcements as the shiny ones will not hold the inks!
COVER's "COVERED" - papers cut, inked, corner round ONLY the back and inside pieces, adhere with ScorTape and/or Art Glitter Glue inside and out. Inside panels are solid blue cardstock (from the double-sided paper pad, NOT the heavy navy), then the short orange print panel and solid paper pockets - border punched, scored 1/2" on three sides, corners clipped, turned, inked then glued in place. Pre-printed panels are also inked and used for embellishment, adhere in place and let it rest.


MAKING POCKET PAGES - these heavy navy cardstock "pages" hold a additional pull-out panel for more photos and/or album memorabilia. I made two - first, score the larger 8 1/2"x 12" pieces 1/2" on top and bottom (vertical) sides, apply either 3/8" ScorTape OR Art Glitter Glue to the edge beneath fold and place the matching smaller 8 1/2"x 10 3/4" piece onto adhesive - creating a open pocket. When these two sides set up/dry, apply glue (NOT ScorTape as it will gum up the hole punch) INSIDE the left edge, smooth to close and secure - when dry, hole punch and add the inked reinforcements to both sides - it is now ready to apply a paper panel, mats and embellishments. Pocket Page INSERTS are inked heavy cardstock panels, corner rounded, applied tabs, photo mats and embellishments - see page photos for placement.
FOLD-OUT PAGES - two are made vertically with the large 12"x 8 1/2" heavyweight navy cardstock pieces, score at 3 1/2" on right hand side and fold (one will fold frontwards, one backwards), corner round, hole punch, add inked reinforcements. Add a solid paper panel to inside along with waterfall mat and panels, see page photos for placement.
WATERFALL elements are made using a base solid color paper and adding paper panels in descending order (see right photo above). Adhere the inked mat to the page first, then score each panel piece 1/2" at top, fold over (fold all of them before gluing onto base mat to be sure they line up correctly and trimmed if necessary) then use ScorTape or glue to secure them onto the mat.
DIMENSIONAL LAYERING - photo below shows the intricacies of the fussy cutting including "fringing" and adding a second layer to the center of larger flowers. The "stacking" is achieved by using 1/4" foam squares or dots.
NOTE - additional fussy cut images from scraps have been added to "fill in" sparce areas of the design. For extra interest, I added Stickles Old Photo as "sand" from the hand of the central figure (photo below) you may have to add several layers for build-up, let them dry in between then add a bit of Diamond Stickles for sand sparkle around her feet. I also added Gold Pearl Dots to some of the flower centers, all of which HAVE TO BE finished and dry BEFORE you add the shadow box top.
STICKLES SAND and more DIMENSIONAL LAYER SAMPLE:
CREATING A SHADOW BOX TOP - you do not have to use this type of album top finish, let your individual creativity and taste prevail. It does take a bit of time but is a beautiful addition to any foyer or coffee table.
BALSA WOOD - strips - cut two pieces 9 1/2" long and two pieces 10 3/4" pieces - straight edge, do NOT cut ends at a 45 degree angle. Using the same acrylic craft paint as for binder cover, paint one of the wider 1/4" sides - dry - glue a 3/4" printed paper strip to one unpainted 1/8" side - both shown in photo below.
NOTE - these shadow box side paper strips can be cut from the pre-printed paper embellishment sheets or scraps - ends can always be trimmed if needed. When the first glued paper side is dry, fold over to the unpainted 1/4" side and glue in place - again allow to dry, see photo below.
FRAME FINISH - once the paper has dried, glue the papered wood strips to the album top
- NOTE - this does not go to edge, but does butt up against or at least cover part of the cover print - trim any areas needed and butt the wood up against each other at ends to form a complete frame (left photo below). When the frame strips have dried, cut one piece 9 1/2"x 11" of "plastic paper" (which is a sheet of heavy clear acetate) to sit on top of the wood strips, encasing the dimensional cover - measure, test for a sure fit and trim if necessary before gluing in place on the strips! Finally, apply a 1/8" ScorTape piece to edge of remaining paper strip, NOW clip corners to a 45 degree angle, peel off backing, gently fold over and onto plastic top - voila - done.
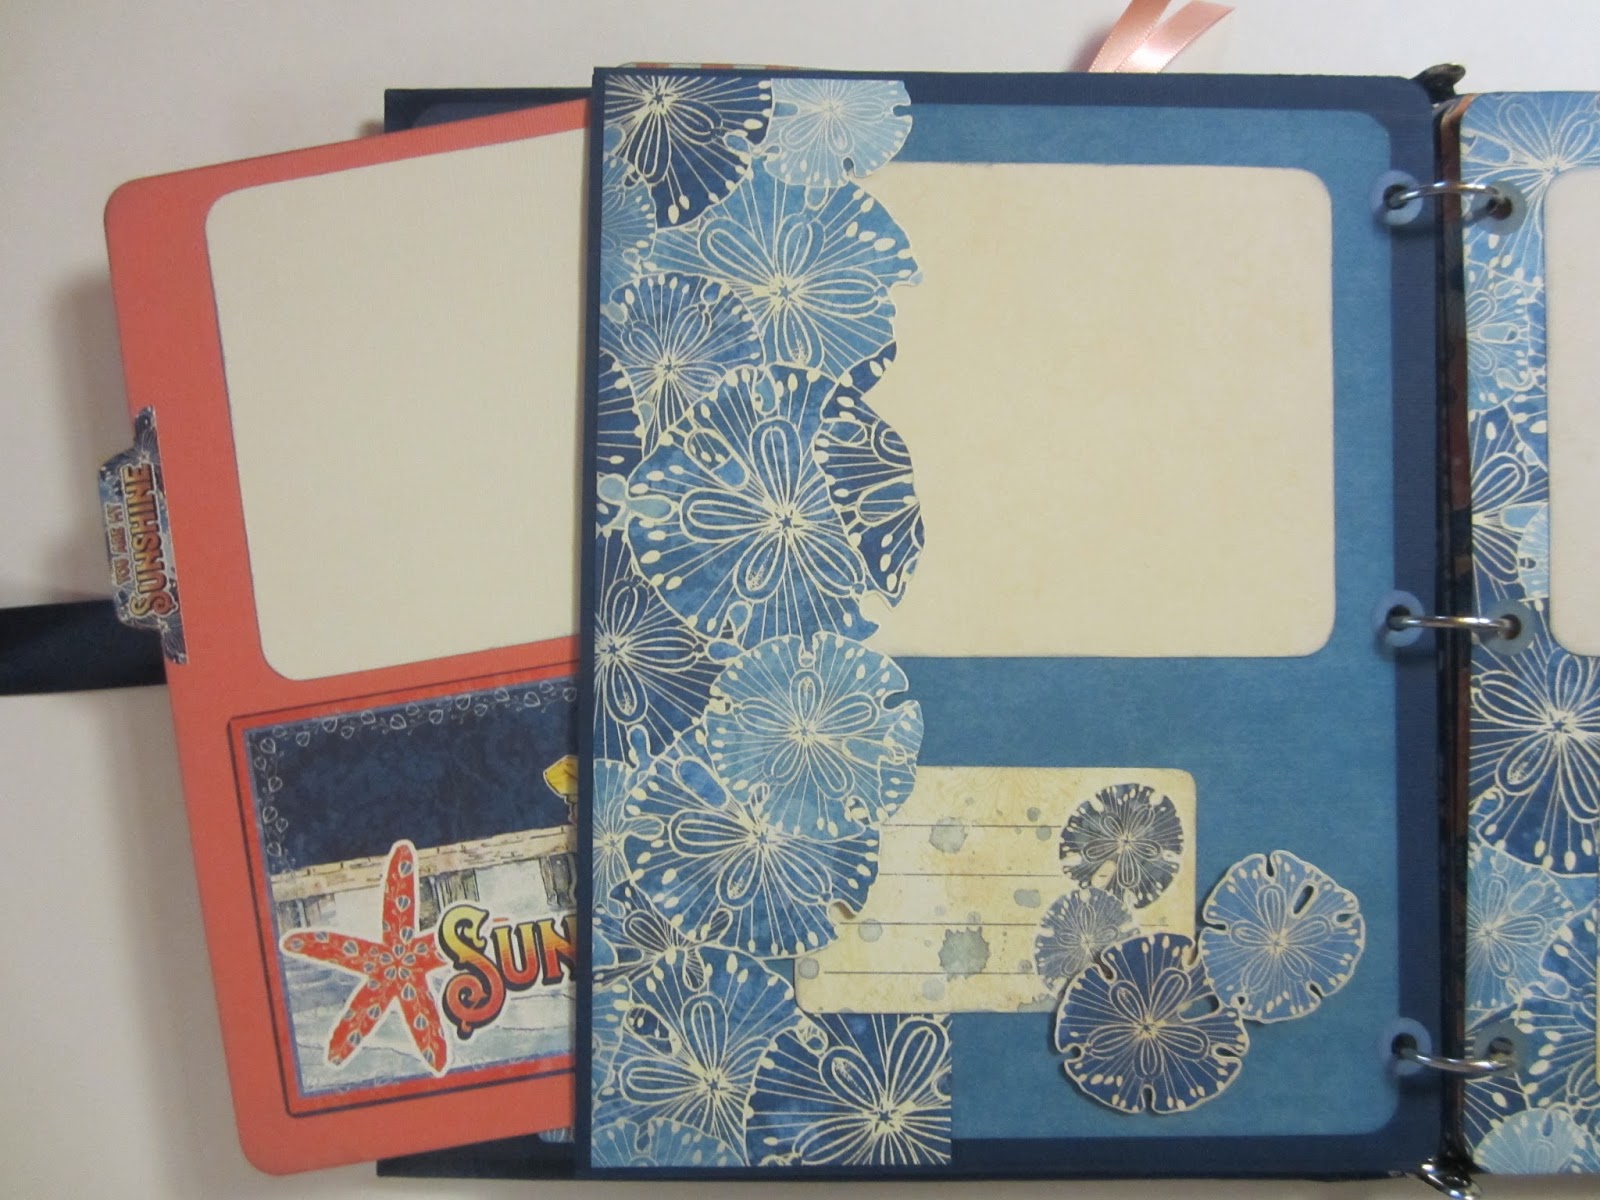
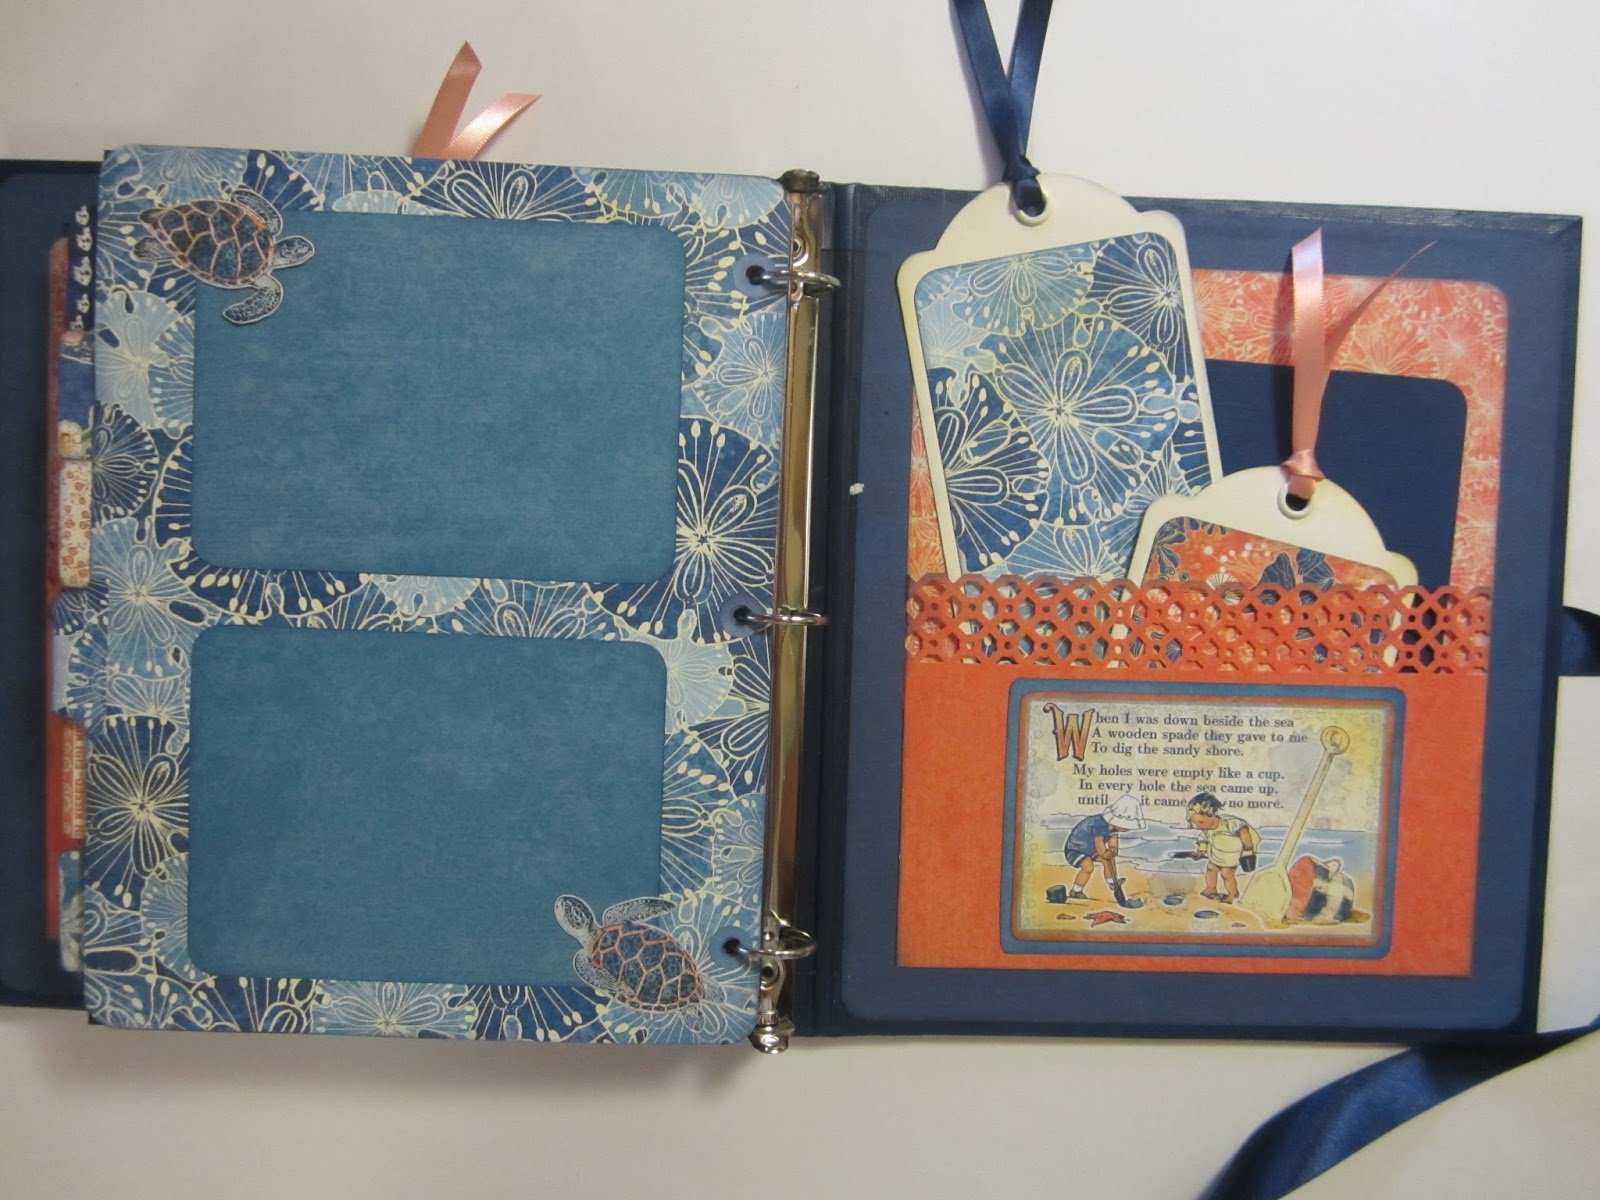
PAGE PHOTOS
the following photo guide begins with the inside front cover and goes through to the inside back cover, showing fold-outs, pocket pages and their pull-out panels, placement of mats, side tabs, tags with ribbons & chipboard pieces, stickers, pre-printed panels, and all fussy cut embellishments -
NOTE - on many pages it looks as though the photo mats are being overlapped by journaling cards and embellishments, in fact, the cards or cut outs have been glued onto the page by outside edges only, leaving a space to slide photos behind them. Place, play and enjoy the process.
SUPPLIES - Graphic 45 Sun Kissed Deluxe Collection Pack includes 16 double-sided 12"x 12" papers, 16 matching double-sided Patterns & Solids pad, Journaling & Ephemera Cards, 12"x 12" cover-weight stickers and 2 double-sided sheets of Cardstock Die-cuts
Graphic 45 Ivory Tags - two 4"x 5 3/4" and two 4"x 8 3/4"
Heavy weight 8"x 11"x 1 1/2" 3-ring chipboard binder
Artisan 12"x 12" Cardstock from Country Craft Creations - 8 sheets Navy, 6 sheets Ivory, 4 sheets Coral
CCC Art Glitter Glue
ScorTape - 1/8", 3/8", 1/2", 1" widths
Bazzill Basics - one piece 12"x 12" Plastic Paper
Ribbons - double-sided satin - 1 yard x 3/8" wide, both navy and coral; 1 yard x 1" wide Navy
Balsa Wood Strips - 42" flats of 1/4"x 1/8" (generally two long pieces sold)
Ranger Inks - Tim Holtz Distress Oxides - Spiced Marmalade, Faded Jeans
Ranger - Tim Holtz Distress Ink - Chipped Sapphire
Ranger ink applicators and sponges
Acrylic craft paint - I used Navy - match chosen paper color
Sponge paint applicator (to throw away)
Matte paper reinforcements, 24 sheets of 6 (you will need 6 per page)
Tab punch - I used We R Memory
Border Punches appropriate to designs - I used ek's
Ranger Distress Stickles - Old Paper and Diamond
Gold Pearl Pen
BASIC CRAFTING TOOLS - 12" paper trimmer, 12" scoring board, bone folder, decoupage "fussy cutting" scissors, craft scissors, 1/4" hole punch, large corner rounder, ruler,
POP-UP CARD BONUS
What to do with "leftovers and scraps" using the supplies listed above, here is a 5"x 7" (A7) hand cut pop-up card to share with your family and friends - enjoy!


