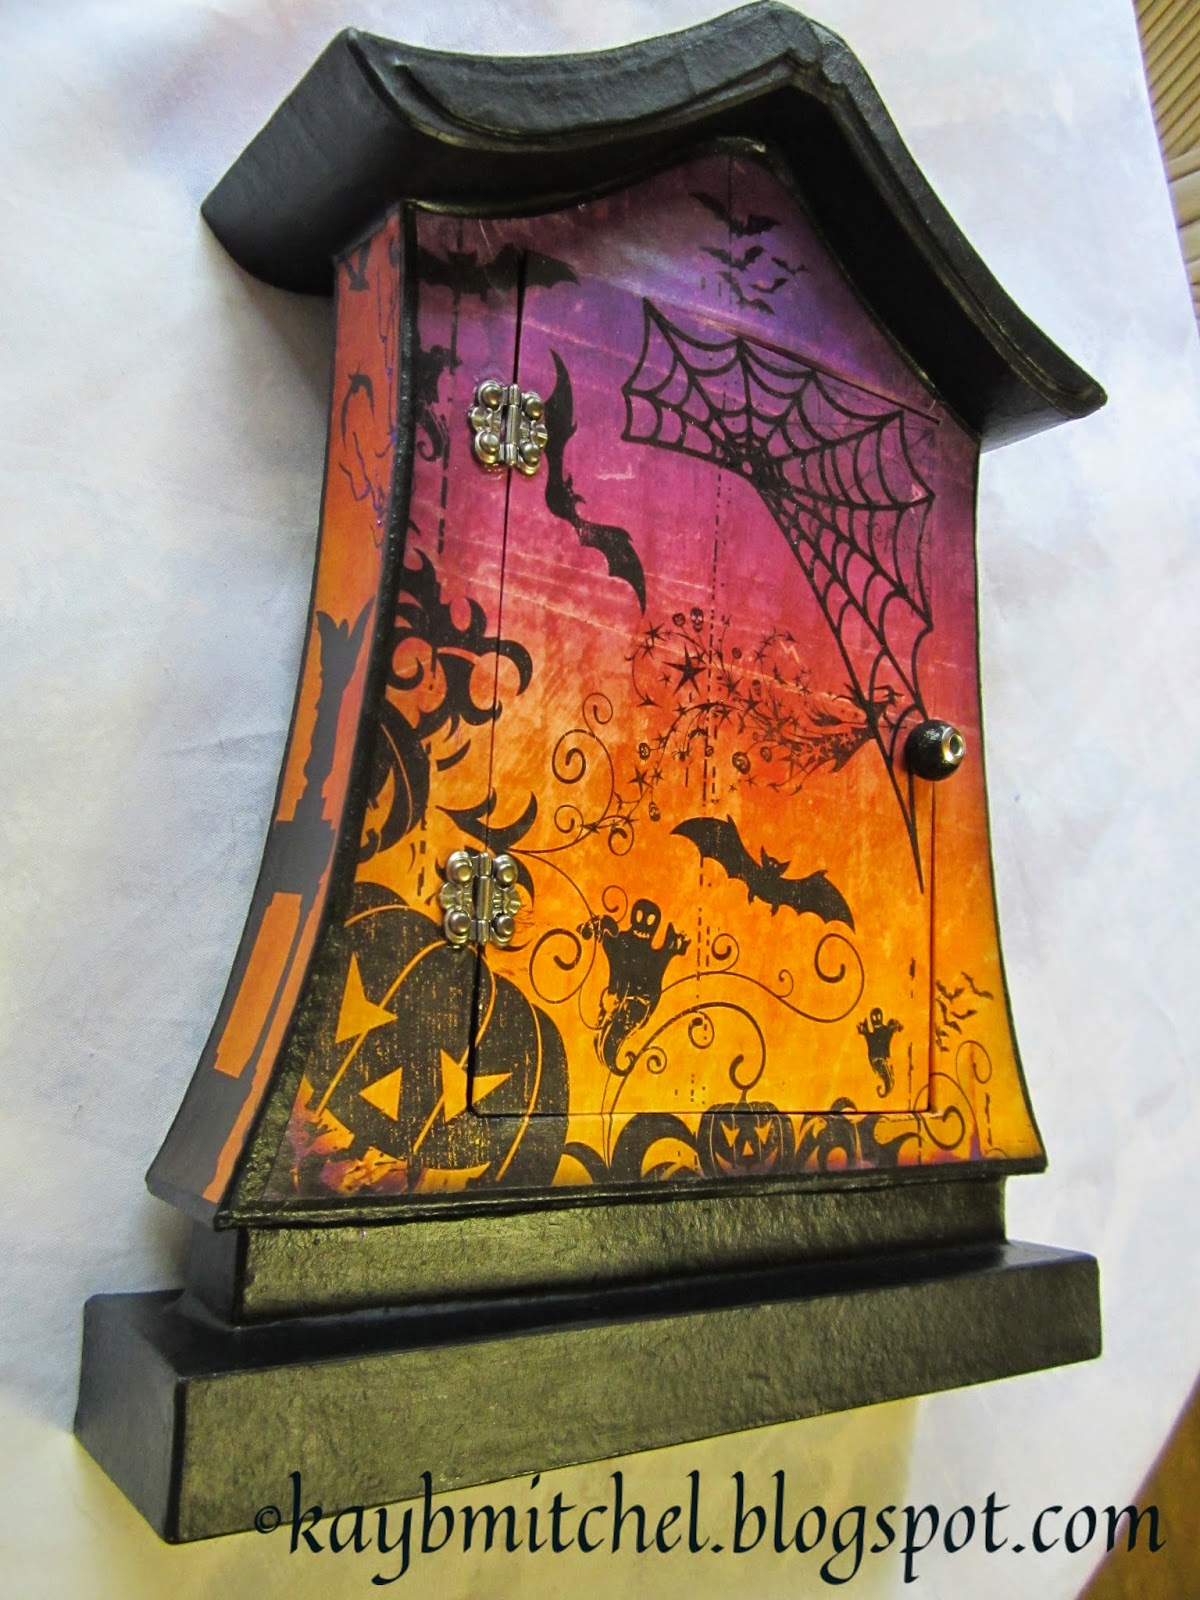
The REALLY proficient will figure out how to make one of these from scratch (lightweight chipboard and brown craft paper - use a hot glue gun and Ranger Glue-n-Seal to put together), however, you might find one on line or lurking around this weekend, waiting for you to purchase. Determine the size of front door you need, then use a SHARP craft knife and steel edge ruler to cut the door shape out of the front panel - if you mess this up, use a heavy piece of chipboard cut to replace the door (guess who did this!) You will also measure and cut four heavy chipboard pieces to form the inside "side panels" of the inner box area and glue them into place with either a hot glue gun or heavy paper adhesive (shown below) - dry - paint with Block Soot Distress Paint - dry.


Determine the paper pieces you will use to cover all, then measure (roughly sketch) and cut - note the black base piece still shows on the edges so you do not have to be exact. I used two of the same papers for the front so I could wrap and glue the edges - both around the front door and into the sides of the box. If you only have one paper piece for the front, remember to separately cut-save-glue the piece that covers door so it will match the front of the box - dry. Add stamps, embossing or diecuts and seal - dry - add Stickle colors to accent printed images. Remember NOT to add a mat sealers over Stickles or it will take away the shine and bling! Glue on hinges and a large bracelet bead door knob using Glossy Accents.


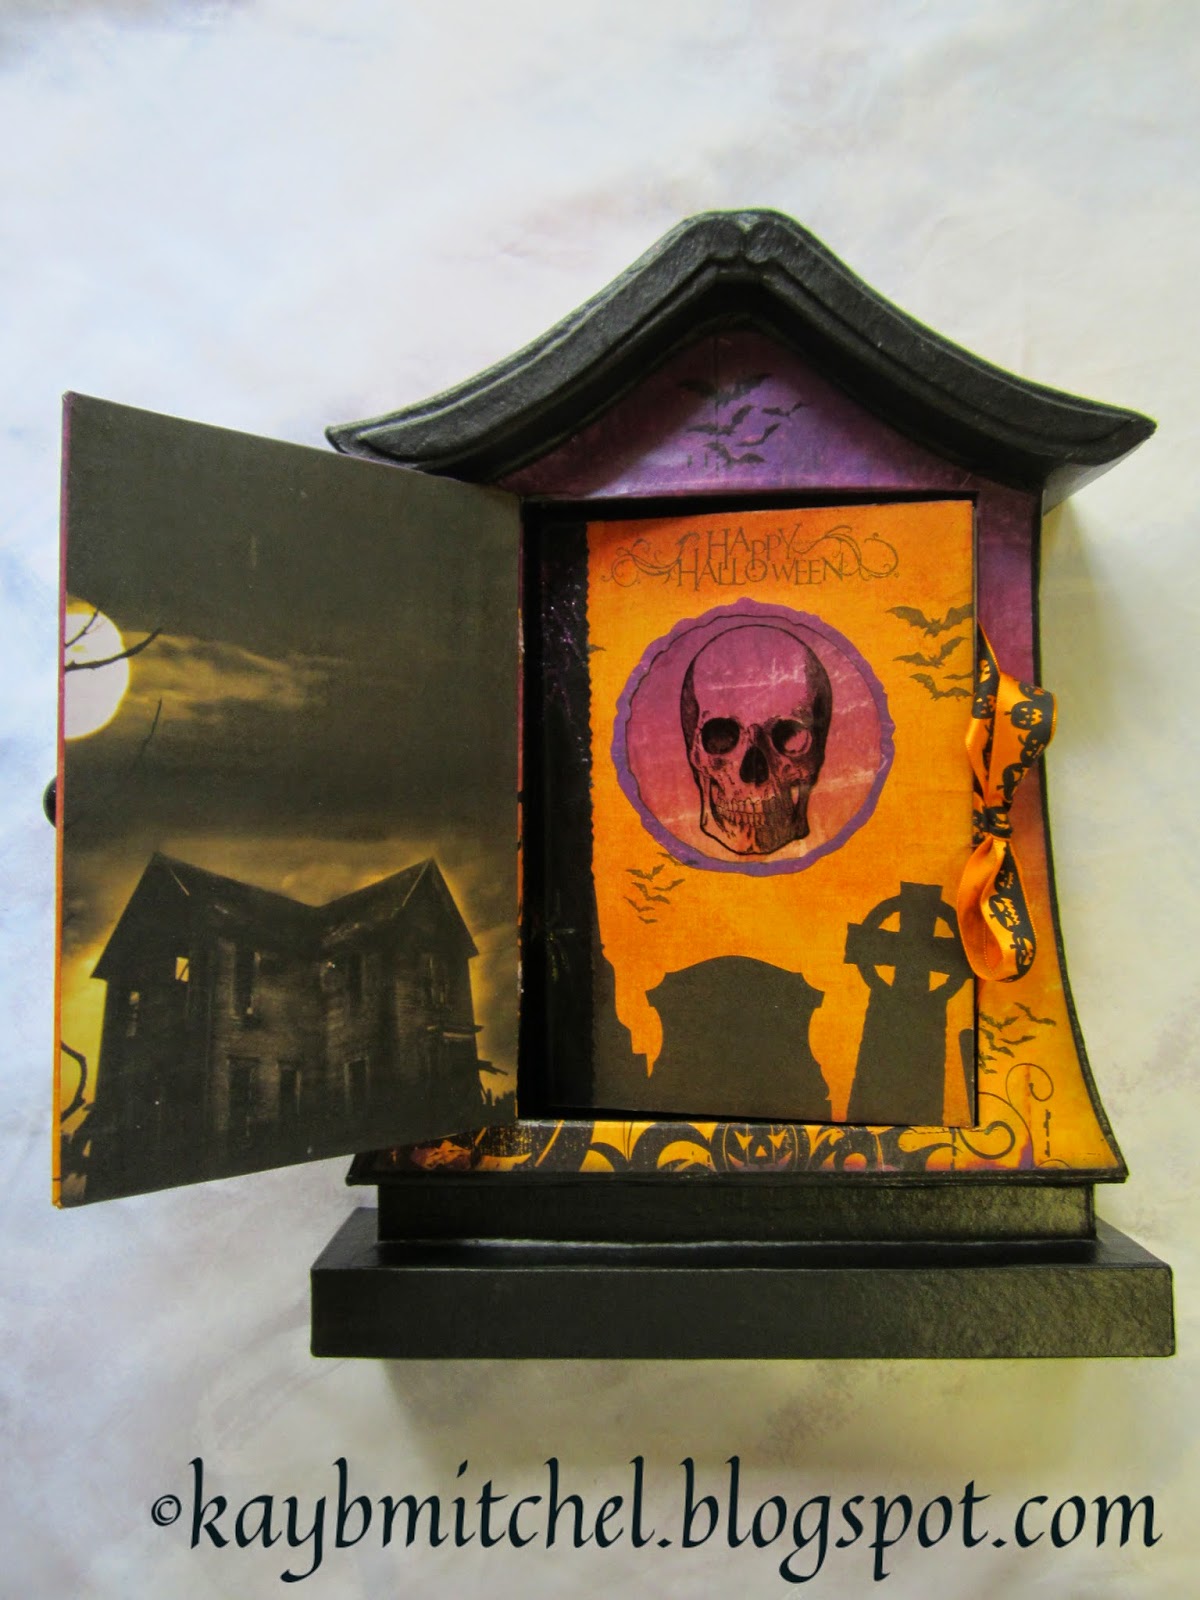
The album is made using heavy double-sided scrapbook papers cut accordingly to the size you need - corner round the outside edges and Distress Ink as desired. The cover is made using a base piece of lightweight chipboard - the front paper has a circle cutout with stamped skeleton image protected by a piece of transparency sheet, glued at the edges into place. Add a ribbon tie glued between the chipboard and the first page. The rest of the pages are glued together back-to-back, several pages have a fold out glued between papers at the side seam. The last page is glued to the back cover of a second piece of lightweight chipboard - insert the second ribbon tie and glue between the paper and the board. Cover or paint the outside back of album. A "spine" piece of black cardstock has been added to the outside of the album to cover up the edges of the glued pages - voila - you're finished.
Your comments are always desired and appreciated - thanks for coming by! K
This is great Kay! I love Halloween...the colors, the images and the little book are right up my alley! Great idea!
ReplyDelete