Finished size of album is 10 1/2"x 8 1/2" x 1 1/2" using 19 pieces of double-sided papers, matching ephemera pack, designer clear stamps and element stickers along with 14 pieces of the CCC Artisan Linen Cardstock in Brown and 4 in Ivory for photo/journaling mats. I used a simple hinge on which to "mount" four large pocket pages - there are many variations of this method on YouTube, I particularly favor those from Tamra Kilgore-Merrill and hope you will look them up as well. Two of the Echo Park clear Page Pockets have also been added, a detail of their cutting and insertion is explained in instructions.
CUTTING HEAVY WEIGHT CHIPBOARD for album cover:
COVERS front and back - two pieces 8 1/2"x 10 1/2"
Front FLAP to close - one piece 8 1/2"x 2 1/2"
Spine Sides - two pieces 8 1/2"x 1 1/2"
CUTTING SOLID LINEN CARD STOCK - BROWN for album cover and hinged insert to hold pages, cut your largest pieces first, then use the smaller "scrap" pieces for flip out pages, photo mats, journaling cards or other embellishments:
Covers front - one piece 9 1/2"x 11" and back - one piece 9 1/2"x 10 1/2"
Front Flap to close album - one piece 9 1/2"x 3"
Spine Sides - outside, two pieces 9 1/2"x 2 1/2" and inside two pieces 8 1/2"x 3"
Pages - four pieces 10"x 9" and four pieces 10"x 7 3/4"
Spine Hinge inside to hold pages - 7 3/4"x 8"
Waterfall backing - one piece 8 1/2"x 7"
Waterfall panel hinges - five pieces 1"x 8"
Flip Page panels can be cut to include the wording on paper side which will be scored to fold under and never show - two pieces 7 7/8"x 4 3/4" and two pieces 10"x 6"
Photo Mats - at least two pieces 4"x 6", more per personal preference
CUTTING SOLID LINEN CARD STOCK - IVORY - cut into four 3 1/2"x 5"; two 3 1/2"x 6"; one 4"x 6"; two 4 1/4"x 5 1/4" and two 5"x 5 1/4" panels to ink and stamp for journaling cards.
CUTTING PRINTED PAPERS - I generally start by picking out the papers I want on the cover and lining the inside of the album, and any other special prints I want to emphasize on a page or those to be cut and included in the clear page pockets. Please refer to the photos at the end of instructions to see exactly what I used where NOTE - not all of the paper corners are rounded, be sure before inking & assembly or change per your personal preferences.
Covers outside and inside, front and back - four pieces 8"x 10"
Front Flap to close album, outside (continuation of map) - one piece 8"x 2" and inside 8"x 2"
Spine Sides - outside, two pieces 8"x 2" and inside one pieces 8"x 1 1/4"
Pages - front and back, eight pieces 9 1/2"x 7 1/2"
Pocket Insert Pages - four pieces 9 1/2"x 7 1/2"
Use your printed SCRAP from the cuts above to make flip page panels, journaling cards as well as,
five Waterfall pieces 8"x 4 1/2"
Pocket on inside back cover - one piece 9"x 4"
1 1/2" circle punch four pieces of printed scrap for tabs on the insert pages AND a 1/2 circle on center front side on each of the four page front paper panels, as shown below - trim if necessary.
1 1/2" circle punch four pieces of printed scrap for tabs on the insert pages AND a 1/2 circle on center front side on each of the four page front paper panels, as shown below - trim if necessary.
EDGE INK ALL the cut printed paper pieces, ephemera and Ivory cardstock panels with Distress Oxide Vintage Photo. Stamp the clear stamp images onto Ivory cardstock with Distress Oxide Walnut Stain. Ink the brown cardstock album AFTER ASSEMBLY with Distress Oxide Black Soot.
COVER CONSTRUCTION - this album has two spine sections so a flap can overlap the top to close - I have several other albums on previous blog posts detailing construction methods that could be used as well. NOTE - laid out flat, the album was too wide to get into one photo, so for these steps, I have taken two photos & placed them side-by-side so you can see both sides.
Line up chipboard pieces on cardstock, shown below - some pieces are flush with the cardstock edge:
Add 1/2" wide ScorTape to edges of chipboard pieces as shown, then add Art Glitter Glue to the rest of the overall piece - FLIP OVER onto cardstock and smooth into place. NOTE - chipboard goes to the edge of the solid cardstock on several pieces so the spine can be secured in subsequent steps.
Next, add 3/8" ScorTape around the edges of the chipboard, as shown below AND 1/2" ScorTape to the cardstock edges around the spine pieces (seen at right). First peel tape backing away from sides of the chipboard spine pieces and place the larger chipboard pieces approx. 1/8" apart - VERY IMPORTANT NOTE - do not place these pieces too close together, otherwise, when they are bent at the crease to fold, the cardstock will crack and tear - the MINIMUM is ONE EIGHT INCH. A second piece of cardstock is then added down the middle of the spine piece (third photo below), and the 1/8" "gully" between the chipboard pieces is GENTLY pushed together with bone folder to secure - this is the fold of the album. Next, peel away ScorTape backing on the outside edge of the cardstock and fold over corners (left photo below), then onto the chipboard sides, using a bone folder to smooth down and secure:

MAGNETS - to close the album, I used three large round magnet sets from Country Craft Creations. In the left photo below, you will see that I measured and marked the inside center of the front flap and two additional side marks closer to the ends. I placed 1/2" ScorTape onto the marks (shown in pink), peeled off the tape backing and placed the magnet set (keep both sides together) on top of the ScorTape, added a second piece of ScorTape to the back side of the magnet (still attached to the front side), peeled the backing away and gently eased the flap over - lining up the sides of the album cover and pressing the magnets onto the front of the album! Voila - they should be in the right place and lined up correctly. NOTE - this has to be done before gluing on printed papers.


When outside of album is covered and magnets secured, I find it easier to adhere the prepared cover papers - as shown below - this is especially important if a inside hinge is being used, because the album will not sit flat to smooth out the papers when the hinge is done - just saying! For added interest, I have cut a small oval into the back cover paper to sign and date after finishing (using a permanent metallic pen), if using as a gift, I will also write the recipients name.
INSIDE HINGE to secure cardstock "pocket" pages: I have prepared for you a "second hinge" in a lighter color, just so you can better see the details and measurements - if I am working out a design and not sure what my measurements will be, I prepare a "mock up hinge" before I cut into the good cardstock - practice makes perfect! The brown cardstock, however, showed up better placement of ScorTape - forgive any confusion - the results are the same.
The paper piece is 8" high to fit the inside spine of the album and 7 3/4" wide to accommodate the number of hinges I needed, and enough paper on each side to secure into the album. Score vertically - first at 1 1/2", then 1/2", another 1/2" and then 1/8" - continue with 1/2", 1/2", 1/8" - etc. as shown in left below. The 1/2" sections will fold over leaving the 1/8" sections exposed. ScorTape 3/8" wide is used down one side of a 1/2" sections to fold together (see brown cardstock example below).
Below photo shows the finished piece with four "hinges" needed to secure and support the cardstock pocket pages, and sides wide enough to glue into album:
Once all is scored and folded, add 3/8" ScorTape to one side of the 1/2" paper fold, and around the edges of the sides - see below. ONE SECTION AT A TIME, peel away ScorTape from the 1/2" hinge sections, and join the two sides together - continue until all are done (right photo below):
Next, add a 1" piece of ScorTape down the middle back of the hinge section, peel and place into the album - on the spine. NOTE - because I am adding waterfall pages to the inside front of this album, I chose to "offset" the hinged section into the album, as shown in the photo below. Another option would be to add additional pages, as there is ample room to do so - your choice. You can also see from the photo looking down into the album, the paper on each side of the hinge secured onto the chipboard covers, which will be covered up with printed papers shortly. Take a breath and let it rest.
Now you can glue in all the prepared inside cover papers as shown below:


CARD STOCK Pocket Pages - are made with two pieces and OPEN BOTH ENDS, the front panel is 10"x 9", scored 1/2" on both top and bottom, and half punched on one 9" side with 1/1/2" circle punch to pull out inserted papers. The back panel is 10"x 7 3/4" with no scoring or punching - plain.
"Flip panels" (left photo below) are another great album addition, I used scrap cardstock pieces with the name edge still on, because it will be scored and turned under for no one to see. The right photo below shows a side flip panel and the third photo below shows a top (or bottom) flip panel - corner round and adhere flip panels onto cardstock pages BEFORE gluing the page sides together!
CLEAR POCKET PAGES - another addition to any size album is adding clear pocket pages. Many paper collections have printed "card" panels that can be cut apart and used for photo mats or journaling and fit perfectly into these pockets. I start with a Echo Park clear pocket page, overall size is 6"x 8", then I cut off the "stitched" plastic strip on outside edge of side, then to fit this smaller album, I cut apart the two pockets just below the top "stitch" line (left photo below). I then add 1/2" ScorTape to both sides of the spine side, just outside remaining side "stitch" line (right photo below).
To secure clear pocket into the cardstock page, peel off one side of ScorTape and place onto either top or bottom of the page side, as photo below shows. (This is easier to do before the pages are glued together and papers are glued on, I forgot to take the photo then). NOTE - it is important that the side "stitch" line of the clear pocket NOT be behind the cardstock edge, but rather beside, to press down flat when folded (right photo below). The second piece of Scor Tape will be peeled when the pages are secured onto the hinge of the album.
Once all the flips and clear card pockets are in place on the cardstock page pieces, glue and/or otherwise adhere the two page panels, for each of the four pages - lining up the plain back panel to the scored sides of the front panel. At this point, you have four separate cardstock pocket pages (not glued into the album yet), and I found it easier to now glue on all of the papers, ephemera and embellishments. Use the photos below as a guide and add or change to your hearts content.
ADDING PAGES to ALBUM - I found using ScorTape to put the pages into album could be a bit tricky if you had to "re-adjust placement", so I used Art Glitter Glue. FIRST, trim the top and bottom ends of the hinges at a SMALL angle so the pages will slide on easier. There is already ScorTape on the clear card pockets, so I separate the page panels by inserting my hand down into them, peel off tape backing, add glue to the hinge in the album, and slide the page sides down onto the hinge. Wipe off any excess glue if needed, then smooth the page sides against the hinge to secure. NOTE - the glued pages usually stand straight up in the air to dry and that is OK - you may have to turn the album on its side for a few minutes - this is the difference in using ScorTape which you would just smooth on and be done with - your choice. Adhere all four pages into place - ONE AT A TIME.
WATERFALL - I added a paper waterfall element to the inside front of the album using cardstock as a backing mat. I used cut printed paper scraps for this, added a 1/2" hinge to the top back, then glued them in place onto the mat, however, you could also cut larger paper pieces, score them 1/2" at the top, fold over and glue onto the mat - either way works.
The special part of this waterfall is the ribbon closure (1 yard each, two colors of seam binding), which has been "threaded" into the backing mat. After the mat has been cut and one side corner rounded, turn to the back, measure and mark the center top and bottom, then glue on another small 1"x 1 1/2" square of cardstock to the edge (left photo below) - allow to dry. Now use a craft knife to cut a horizontal 1" slit into the reinforced cardstock approx. 1/4" from the edge, so the ribbon can feed through to the front (right photo below). Secure the ribbon in place on the back with tape. Turn back to the front and adhere the waterfall papers into place, tie the ribbon and you are done.
INSIDE FRONT of album with ribbon seam binding) tied Waterfall panels:
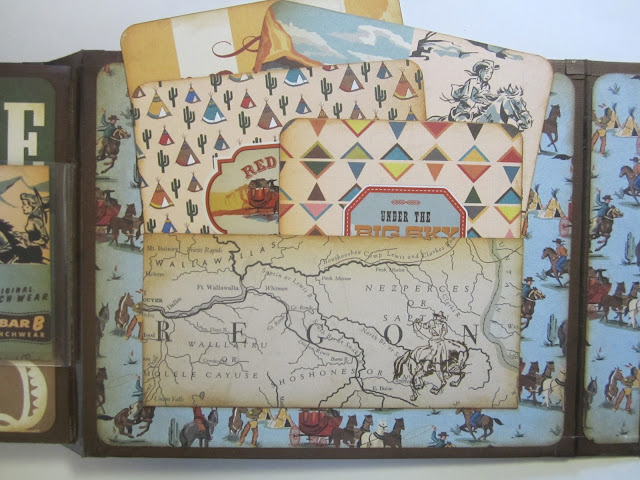
To view details of each, here are the 4 page pockets, photographed flat front to back, before insertion into album. FRONT of Page One - when you open the album, with clear pocket insert and card.
FRONT of Page One showing back of the clear pocket insert with stamped journal/photo mat:
BACK of Page One showing built in flip panel on right side with stamped journal mat & ephemera:
BACK of Page One with flap panel open to show paper and embellishment cut from scrap:
FRONT of Page Two showing top flip panel with paper strips:
FRONT of Page Two showing attached top panel flipped up with embellishment & journal mat:
BACK of Page Two showing clear pocket insert with card on right and photo mat:
BACK of Page Two showing back of the clear pocket insert with stamped journal/photo mat:
FRONT of Page Three showing added panel on left side with journal mat and ephemera:
FRONT of Page Three showing open flip panel with cut scrap embellishments and ephemera:
BACK of Page Three showing embellishment and clear pocket insert with card on right:
BACK of Page Three showing added scrap, ephemera & clear pocket insert back with stamped mat:
FRONT of Page Four with bottom flip panel, stamped journal mat and scrap embellishment:
FRONT of Page Four with bottom flip panel open to show paper embellishment:
BACK of Page Four showing clear pocket insert with card & ephemera on right:
BACK of Page Four showing clear pocket insert with stamped journal mat:
PANEL INSERTS for the four cardstock pages, with tab front detail, front and back:
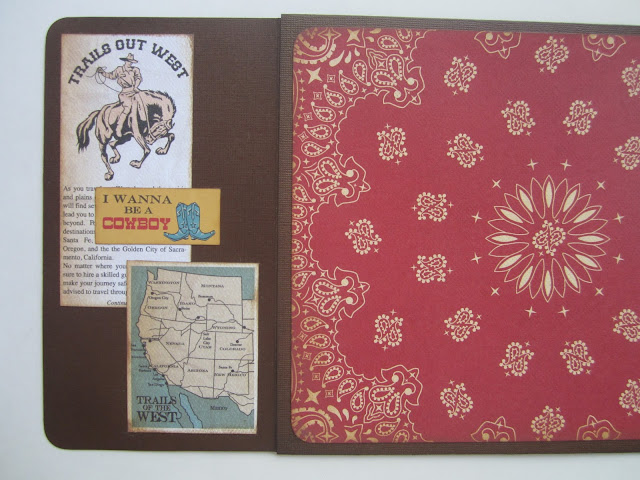
INSIDE BACK of album with pocket and "scrap" card inserts, detailed below:
Back pocket insert cards, front and backs with stamped images:
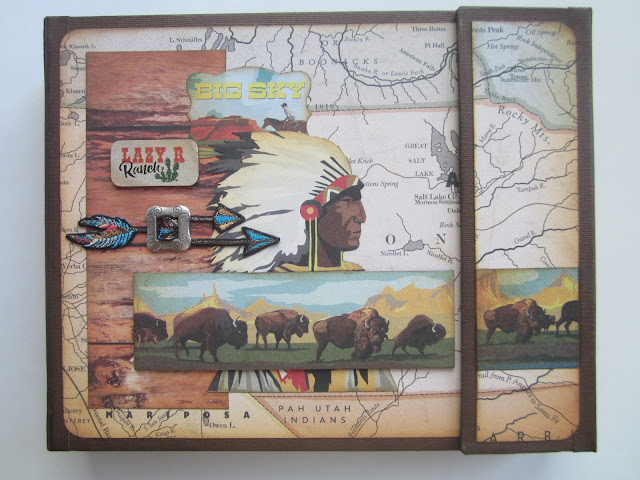
COVER detail - I used inked, printed paper scraps, Indian head fussy cut from card then sliced to go above & below buffalo strip, Ephemera and a small silver buckle with embroidered arrows (I found at Jo-Anns). The left side buffalo paper strip was glued to a 1/8" black foam sheet, cut out and glued on album, the matching right side buffalo piece and other papers were glued on flat. The embroidered arrows were cut apart, one arrow tail was threaded through the buckle and hot glued on, the others cut to fit and also hot glued.
SUPPLIES - available from Country Craft Creations store:
Carta Bella "Cowboy Country" paper collection, matching Ephemera Pack, Designer clear Stamps and Element Stickers
CCC Artisan Linen Cardstock - Brown and Ivory
Heavyweight Chipboard - three 12"x 12" pieces
Large Magnet Sets for closure
Seam Binding for ribbons - 1 yard each of dark brown and cream
Echo Park Pocket Pages for 4"x 6" cards (overall size is 6"x 8")
Scor Tape - 3/8", 1/2" 1"
Art Glitter Glue
Ranger Distress Oxide Inks - Vintage Photo, Walnut Stain and Black Soot
Other supplies used:
Ranger Ink applicators and sponges
Foam Adhesive Sheet - black 1/8" thick
Small silver tone buckle and embroidered arrows (cover embellishments) from JoAnn's
Basic crafting supplies and tools needed: 12" paper trimmer, 12" score board, ruler, decoupage (fussy cutting) scissors, craft scissors, large and small corner rounders, glue gun, clear stamping block, 1 1/2" circle punch


This is lovely! Thank you for the tutorial!
ReplyDelete